The key to effectively preserving food is adequate packaging, whether you’re trying to put together your long-term emergency supplies or simply want to eat garden-fresh fruits and veggies all winter long. Having good Packaging for Freeze-Dried Food is vital as it is the sole line of defense separating our meals and the conditions that can cause them to spoil. Eliminating three things is particular to stop items from spoiling: lighting, oxygen, and water. To avoid them from acquiring moisture from the air, freeze foods are stored in airtight containers. For bulk packing, polymer layered foil packs, plastic, and metal canisters, or metals and fiber drums may also be used. Often if possible, equip a chamber with shelves and store your food properly tucked in the climate it requires (such as a chilly cellar or a dark closet), and it can last for decades. Unraveling the secrets of packaging freeze-dried food. Learn how it stays fresh and delicious!

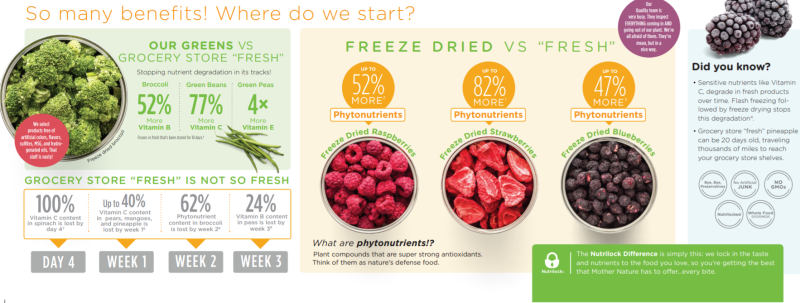
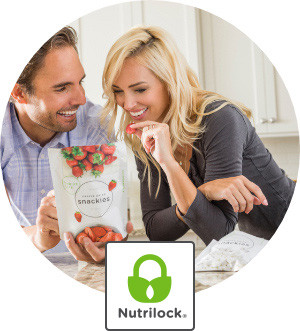
Thrive Life uses the patented Nutrilock process to ensure the highest quality product with locked-in nutrients and to keep our food as fresh as the day it was harvested, so you never have to chase expiration dates. All together there are over 40 steps in our quality and production process before a product is Nutrilock certified. That’s a lot for us to worry about. But we’re happy to do it if it means all you have to do is look for the seal.
Packaging Freeze-Dried Food
You can see these steps below, but first let’s answer your question and talk about ‘how to package freeze dried food’.
If the meals will be consumed in the near future, using reusable resources like jars is wise and an excellent way to save money. Jars are useful as they can be repurposed, and you are able to easily view what you have preserved.
Jars – You don’t have to create jams or pickles to enjoy the benefits of canning. For storing freeze-dried foods, traditional canning jars are ideal. All that you need to do is sanitize them and add an air absorbent to keep your food safe and secure for the long term. Preferably one can use a sealer to seal the jars, but this method requires that all of the oxygen be removed.
Cans – Cans are an excellent food storage option. They are not only airtight but also prevent unintentional light exposure. The procedures are quite similar to how food is packaged in jars. Cans have one disadvantage in that they cannot be recycled or resealed
Mylar Bags – This is the most basic way to store your freeze-dried food. Mylar bags are effective in blocking out both light and air, but you should remove as much air as possible before sealing the mylar bags. It is one of the best oxygen absorbers. Bags take up less room than jars or containers, too. Mylar bags may be retaped once used and can be rinsed out and reused, similarly to a can or jar. Mylar bags are indeed lightweight and portable in an emergency.
Containers for Protracted Food Storage – These are containers made exclusively for long-term storage. They provide the necessary protection, but the cost is prohibitive. They are frequently expensive and may necessitate the purchase of additional products or the company’s own food. Another consideration is space, as these containers are typically rather large.
However, when Packaging Freeze-Dried Food, a key is needed.
Viola! Oxygen Absorbers – This a must-have item. An oxygen absorber is placed in a mylar bag. Whatever packing method is in use, adding a handful of these to your food will have a significant impact on the lifespan of any preservation.
You can indeed keep freeze-dried food in vacuum-sealed containers too. Compared to jars, this will give you a longer shelf life.
Going camping, hiking, or off-roading and needing a decent pack for a quick and wholesome supper is quite easy. Check them out; they’re fantastic and effective at saving you some stress and giving you more time to pack. Or you can just buy Thrive Life freeze dried cans and pouches :).
Now let’s talk about the nutrilock process steps:

“Wow! That’s amazing!” We hear that phrase a lot. Especially when someone tries our food
for the first time..
So what’s our secret? Well, it’s a secret. But we will tell you there are over 40 steps in our
proprietary freeze dry process to make sure the taste, quality and nutrition are exactly how
people describe it: amazing!
WHAT’S IN A PROMISE?
1. Meet with farmers or their suppliers to ensure they meet our high standards of production, including soil conditions and overall processes.
2. Verify that each supplier follows strict food safety plans to prevent cross-contamination
of allergens and to prevent other possible contaminants.
3. Work with customers and consultants to design products that are desired and relevant
for today.
4. Select Grade A products.
5. Prohibit foods from companies or countries that don’t meet our strict food standards.
6. Select products free of artificial colors, flavors, sulfites, MSG, and hydrogenated oils.
7. When possible, select products that are Non-GMO and gluten-free.
8. Scrutinize and test potential ingredients with our Product Quality Team.
9. Scrutinize and test potential ingredients with our Culinary Team.
10. Verify that each harvest takes place at the peak time frame of ripeness.
11. Quick-freeze produce within hours of harvesting to maximize flavor and lock in nutrients.
12. Once frozen, transport the food to Thrive Life Headquarters in American Fork, Utah, as
quickly and safely as possible.
13. Ensure product stays at the exact correct temperature before going into the freeze
dryer.
14. Inspect the product as it arrives from the farm to our Headquarters (QA Team).
15. Test dry every food batch to ensure appropriate time, temperature, and pressure. (Food
Science Team)
16. All employees who work to freeze dry the food go through a strict process to ensure
they meet stringent GMP requirements.
17. Inspect the product as it’s prepped for the freeze dryer. (Production Team)
18.
Freeze dry. (Sorry, but steps 18–26 are proprietary!)
Series of testing and verifications during FD process
26.
27. Transfer product safely from freeze dryers to Holding where it is inspected and tested
before being packaged.
28. Test the product for appearance, taste, texture, and color. (Food Science Team)
29. Test the product overall experience. (QA Team)
30. Test the product overall experience. (Product Development Team)
31. Test the product overall experience. (Culinary Team)
32. Final Product Test. (Owners)
33. Inspect all production rooms and machinery for cleanliness utilizing Safe Quality Food
guidelines.
34. Test rooms for allergens.
35. All employees that package the food go through a strict process to ensure they are
sanitary.
36. Inspect cans to ensure correct labeling, fill, and seal.
37. Receive certification by FDA and USDA.
38. Partner with USDA throughout the production of our meat and egg products.
39. Perform third party audits on a regular basis with highest standard scores.
40. Final inspection by QA Team with documentation of the whole process, including keeping certain amounts of each batch for future testing.
41. Safely send product to the warehouse where it awaits which home it will be assigned to.
All together there are over 40 steps in our quality and production process before a product
is Nutrilock certified. That’s a lot for us to worry about. But we’re happy to do it if it means
all you have to do is look for the seal.


